FPS games remain a staple of the game industry, and with free engines like Godot, making a Godot FPS is a match made in heaven.
Welcome to the tutorial, and get ready to learn some in-demand skills for creating first-person shooter games! Throughout this tutorial, we will work with the 3D aspects of the Godot game engine to enhance your foundations when it comes to action game development. Additionally, we’ll be creating a first-person shooter from scratch, which will show you how to set up the FPS player and camera, enemies, efficient shooting mechanics, health and ammo pickups, and more.
Before we begin, it’s important to know that a basic understanding of the Godot engine is required. If this is your first time using Godot, I recommend you read through the How to Make Games with the Godot Game Engine post first. It will teach you how to install Godot, and the basics of the engine and GDScript.
Already know how to do all this? Go ahead and skip to Part 2!

Table of contents
Godot FPS Project Files
For this project, we’ll be using a handful of pre-made assets such as models and textures. Some of these are custom-built, while others are from kenney.nl, a website for public domain game assets.
- You can download the assets for the project here.
- You can download the complete Godot FPS project here.
Did you come across any errors in this tutorial? Please let us know by completing this form and we’ll look into it!
FREE COURSES 
FINAL DAYS: Unlock coding courses in Unity, Godot, Unreal, Python and more.
Did you come across any errors in this tutorial? Please let us know by completing this form and we’ll look into it!

FINAL DAYS: Unlock coding courses in Unity, Godot, Unreal, Python and more.
Let’s Begin
To begin, create a new Godot project. We have a few assets such as models and textures we’ll be using (download above), so let’s drag the Font, Models and UI folders into the FileSystem.

Now that we have the assets for our Godot FPS, let’s create our first scene by going to the scene panel and selecting the 3D Scene option.
- Rename the node to MainScene.
- Save the main scene to the file system.

Building Our Environment
The first thing we’re going to do is create our environment so we have somewhere for the player to exist (unless you really want your Godot FPS to be in the void). In our Models/Environment folder, we have a Ground model. Drag that into the scene window to create a new MeshInstance node. Set the position to 0.

The MeshInstance node will render a model, but that’s it. In our Godot FPS, we want the player to be able to collide with the ground, as otherwise they’d sink through and go out of bounds endlessly until the game is shut down.
So to do this, we can select the ground node and in the scene panel, select Mesh > Create Trimesh Static Body.

This will create two children nodes.
- StaticBody: static physics object which can detect collisions
- CollisionShape: defines the shape and dimensions of the object’s collider

With this node, we can change the position, scale, and rotation. Go ahead and create an environment. You can make your Godot FPS look like ours below, or you can go crazy – this is where you get to be creative!

One thing you may notice, is that the node structure is starting to get quite long and convoluted since we have a lot of models. To fix this, we can create a new node as a container and store the models in as children.
Create a new node of type Node as a child of the MainScene. Drag the model nodes inside to make them children. Now we can visually open or close the node container.

Another thing you might notice is that the scene is quite dark. To fix this, we can add in a directional light which will act like a sun.
- Create a new node of type DirectionalLight.
- Enable shadows.
- Set the Rotation Degrees to -60, 45, 0.

Creating the Player
Now we can create the player for our Godot FPS. Create a new scene with a root node of KinematicBody and rename it to Player. We can then save the scene.

Let’s add a CollisionShape node to detect collisions.
- Set the Shape to Capsule
- Set the Radius to 0.5
- Set the Height to 1.5
- Set the Translation to 0, 1.25, 0
- Set the Rotation to 90, 0, 0

Next, add a new Camera node. This will allow us to see through the player’s eyes.
- Set the Environment to default_env.tres (found in file system)
- Enable Current
- Set the Translation to 0, 0.25, 0

For the gun, drag the shotgun.obj model into the scene and make it a child of Camera. To see through the camera’s perspective, select the camera and in the scene view toggle the Preview option (top left of the window).
- Rename the node to GunModel
- Set the Translation to 0.2, -0.2, -0.7
- Set the Rotation Degrees to 0, -180, 0
- Set the Scale to 10, 10, 10

The gun also needs a muzzle so we know where to spawn the bullets. Create a new Spatial node as a child of GunModel.
- Enable Use Local Space (shortcut = T) so that the gizmos are orientated in local space
- Rename the node to Muzzle
- Position the node in front of the gun

Back in the MainScene, let’s drag in the Player.tscn to create a new instance of the Player scene.

With this here, we can press the play button (make the MainScene the main scene) and you should be looking through the player’s eyes.
Finally, before we begin scripting anything for our Godot FPS player, let’s set up our input actions. Open the Project Settings window (Project > Project Settings) and go to the Input Map tab. Create a new action for:
- move_forward (W key)
- move_backward (S key)
- move_left (A key)
- move_right (D key)
- jump (Space key)
- shoot (Left Mouse Button)

Scripting the Player
Now that we have our player scene setup, let’s get to scripting the player movement, jumping, gravity, shooting, etc. We’ll cover most of this at once, even if we can’t make everything functional yet (since our Godot FPS is missing quite a few core components).
In the Player scene, create a new script on the Player node. By default, it should be called Player.gd. We’ll begin by filling in our variables.
# stats
var curHp : int = 10
var maxHp : int = 10
var ammo : int = 15
var score : int = 0

# physics
var moveSpeed : float = 5.0
var jumpForce : float = 5.0
var gravity : float = 12.0

# cam look
var minLookAngle : float = -90.0
var maxLookAngle : float = 90.0
var lookSensitivity : float = 0.5

# vectors
var vel : Vector3 = Vector3()
var mouseDelta : Vector2 = Vector2()

# player components
onready var camera = get_node("Camera")
First, we can begin by setting up the ability to look around. The _Input function is built into Godot and gets called whenever an input is detected (keyboard, mouse click and movement). What we’re doing here, is getting the direction and length that our mouse moved.
# called when an input is detected
func _input (event):

    # did the mouse move?
    if event is InputEventMouseMotion:
        mouseDelta = event.relative
Next, we’ll create the _process function. This is built into Godot and gets called every frame. Here, we’re going to use that mouseDelta vector and apply that to the camera and player rotations.
# called every frame
func _process (delta):

    # rotate camera along X axis
    camera.rotation_degrees -= Vector3(rad2deg(mouseDelta.y), 0, 0) * lookSensitivity * delta

    # clamp the vertical camera rotation
    camera.rotation_degrees.x = clamp(camera.rotation_degrees.x, minLookAngle, maxLookAngle)

    # rotate player along Y axis
    rotation_degrees -= Vector3(0, rad2deg(mouseDelta.x), 0) * lookSensitivity * delta

    # reset the mouse delta vector
    mouseDelta = Vector2()
We can now press Play and see that we look around when we move the mouse.
Next up is movement. This will all be done in the _physics_process function. It’s built into the KinematicBody node and gets called 60 times a second (good for physics).
# called every physics step
func _physics_process (Delta):
First, we’re going to check for our keyboard inputs.
# reset the x and z velocity
vel.x = 0
vel.z = 0

var input = Vector2()

# movement inputs
if Input.is_action_pressed("move_forward"):
    input.y -= 1
if Input.is_action_pressed("move_backward"):
    input.y += 1
if Input.is_action_pressed("move_left"):
    input.x -= 1
if Input.is_action_pressed("move_right"):
    input.x += 1

# normalize the input so we can't move faster diagonally
input = input.normalized()
Next, we need to get the forward and right direction of our player, so we know which way we’re facing and can apply that to our velocity.
# get our forward and right directions
var forward = global_transform.basis.z
var right = global_transform.basis.x
We can then set our velocity, apply gravity and move the player!
# set the velocity
vel.z = (forward * input.y + right * input.x).z * moveSpeed
vel.x = (forward * input.y + right * input.x).x * moveSpeed

# apply gravity
vel.y -= gravity * delta

# move the player
vel = move_and_slide(vel, Vector3.UP)
Finally, we’re going to check for the jump action and change the Y velocity when that happens.
# jump if we press the jump button and are standing on the floor
if Input.is_action_pressed("jump") and is_on_floor():
    vel.y = jumpForce
If we press the play button now, you’ll be able to move, look around and jump. That’s how to create a basic first-person controller in Godot. Now let’s get working on the rest of the game.
Creating the Bullet Scene
As you might imagine, shooting will be pretty integral to our Godot FPS. Before we start to script the ability to shoot, we need to create a scene for the bullet. Create a new scene with a root node of Area. This is a node which can detect physics collisions.
- Save the scene to the FileSystem.
- Drag the ammo_pistol.obj model into the scene as a child of Bullet.
- Set the model’s Scale to 10, 10, 10. (not in image)
- Set the model’s Rotation Degrees to 90, 0, 0. (not in image)
- Attach a new CollisionShape node.
- Set the Shape to Capsule
- Set the Radius to 0.03
- Set the Height to 0.07

On the Bullet node, create a new script called Bullet.gd. We’ll start of with the variables.
var speed : float = 30.0
var damage : int = 1
Inside of the _process function, we’ll move the bullet forwards at a rate of speed units per second.
# called every frame
func _process (delta):

    # move the bullet forwards
    translation += global_transform.basis.z * speed * delta
Now it’s time to detect if we’re hitting something. Select the Bullet node and over in the inspector, click on the Node tab to see all of the signals that the node emits. A signal is like an event which can call a function when something happens. In our case, we want to connect the body_entered signal to our script. This gets called when the collider enters another node’s collider.
Double click on that signal and hit enter. A new function should have appeared in the bullet script.
We’re going to check if the body we hit has a function called take_damage. We haven’t created this yet, but we will do it soon. If so, deal the damage and destroy the bullet by calling the destroy function. This is a custom function we’re going to create right after this one.
# called when we enter the collider of another body
func _on_Bullet_body_entered (body):

    # does this body have a 'take_damage' function?
    # if so, deal damage and destroy the bullet
    if body.has_method("take_damage"):
        body.take_damage(damage)
        destroy()
The destroy function will simply destroy the bullet instance.
# destroys the bullet
func destroy ():

    queue_free()
We now have a bullet which will move forward and damage whatever it hits (yet to be added). Let’s also add in something so that the bullet can’t travel forever if it misses its target.
In the Bullet scene, create a new node of type Timer. This node will count up and when it hits a certain amount, we’ll call the destroy function.
- Set the Wait Time to 5
- Enable Autostart

Over in the node tab, let’s connect the timeout signal to our script. This gets called once the wait time has been reached. Double click on the timeout signal and a window will pop-up. Change the Receiver Method to destroy. This will connect the signal to our existing function.

Shooting Bullets
Now that we have our bullet, let’s implement the ability to shoot it for our Godot FPS. Over in the Player script, let’s create some new variables to keep track of our components.
onready var muzzle = get_node("Camera/GunModel/Muzzle")
onready var bulletScene = preload("res://Bullet.tscn")
Down in the _process function, let’s check for when the shoot action is pressed.
# check to see if we're shooting
if Input.is_action_just_pressed("shoot"):
    shoot()
The shoot function will spawn a new instance of the bullet scene and position it.
# called when we press the shoot button - spawn a new bullet
func shoot ():

    var bullet = bulletScene.instance()
    get_node("/root/MainScene").add_child(bullet)

    bullet.global_transform = muzzle.global_transform
    bullet.scale = Vector3.ONE

    ammo -= 1
If you want the mouse to be locked when we’re playing the game, we can do so in the _ready function which gets called when the node is initialized.
func _ready ():

    # hide and lock the mouse cursor
    Input.set_mouse_mode(Input.MOUSE_MODE_CAPTURED)
We can now press play and test it out.
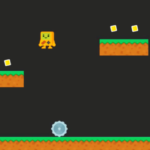
Creating the Enemy
Our Godot FPS is now ready for enemies to give the player an actual target for our game mechanics.
Create a new scene with a root node of KinematicBody.
- Rename it to Enemy.
- Save the scene.
- Attach a new node of type MeshInstance.
- Rename it to Model.
- Set the Mesh to capsule.
- Set the Radius to 0.5.
- Set the Mid Height to 1.5.
- Rotate and re-position the mesh so that it is orientated like below.

In the MeshInstance node, you’ll see a Material property which is empty. Select it and click New SpatialMaterial.
- Set the Albedo Color to red.

Let’s then attach a new CollisionShape node and make it match the mesh.

Finally, we’ll attach a Timer node to the enemy. This is going to be used in order to attack the player.

Continued Part 2
And that’s where we’ll conclude for the time being!
At this point, we’ve learned several essential foundations for setting up a first-person shooter in Godot. First, we established our arena where all the action will take place. We then created a player, along with a camera, which is scripted to follow the mouse movements as we move the player around. To this player, we also added a gun model that can shoot bullets – which we also created with performance in mind. Lastly, we set up our enemy model and learned a bit about materials in the process.
Of course, there is still more needed to complete our Godot FPS! In Part 2 of this tutorial, we will finish up building our Godot FPS by implementing the enemies’ movement, setting up ammo and health pickups, and polishing everything off with a nifty UI! We hope to see you there.