You can access the full course here: Create a 2D RPG with Godot
Table of contents
Creating the Player Scene
In this lesson, we’re going to begin our Player controller.
This is going to be a player that we can move right, left, up, down, and also have the ability to interact with things such as chest and enemies.
Creating a New Scene
Go to Scene > New Scene

We are going to have a root node of ‘Other Node’, and search up KinematicBody2D.


KinematicBody2D allows us to move the object around using inputs and it is useful for making a character controller.
Let’s rename the node to “Player“:

And save the scene as “Player.tscn”:

Adding Components – Sprite
Now we need to add a few components on our player.
First of all, we need a Sprite, so we can actually see what our player looks like (Later on, we’re going to replace it with an animated sprite node, but right now we’re just going to use our sprite for setting it up.)
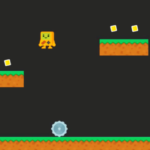
We’re going to drag in one of the player sprites (e.g. Sprites > Player > player_s_0.png) into the scene, and rename the node to “Sprite”.

Let’s set the position to be the center of our screen (0, 0).

Adding Components – Collider
We’re going to add another child node to our Player…

… and search up CollisionShape2D. This is a node that allows our player character to collide with walls and enemies.

Let’s set the shape to be a capsule:

You can resize the capsule by dragging the small dots.

Adding Components – Raycast
Finally, we need one more component for our player– a Raycast2D.

You can set the position/direction/max distance of a raycast, for example, we are currently shooting it from the middle of our player downwards.

If it hits another collider, it is going to return the object it hit. We’re going to use this to detect if we are looking at an enemy or a chest so we can interact with it.

In the inspector, make sure that the RayCast2D is ‘Enabled‘. Also, by checking on ‘Exclude Parent‘, we can make the ray ignore the collider of the player (self).
Let’s save the Player scene, go back to our main scene, and drag in our player scene (Player.tscn) into the main scene.

Player Movement
In this lesson, we’re going to begin to script our player.
Creating a new script
I’m going to create a new script called Player.gd.

First of all, we need to create our variables that we’re going to be using.
extends KinematicBody2D

var curHp : int = 10
var maxHp : int = 10
var moveSpeed : int = 250
var damage : int = 1

var gold : int = 0

var curLevel : int = 0
var curXp : int = 0
var xpToNextLevel : int = 50
var xpToLevelIncreaseRate : float = 1.2

var interactDist : int = 70

var vel : Vector2 = Vector2()
var facingDir : Vector2 = Vector2()

onready var rayCast = get_node("RayCast2D")
Here is the list of our basic variable components that will be used in our RPG game.
- curHp – Player’s current health points
- maxHp – Player’s max health points
- moveSpeed – Player’s move speed
- damage – The amount of damage our player can inflict on enemies
- gold – The amount of gold our player is holding
- curLevel – Player’s current level
- curXp – Player’s current experience points
- xpToNextLevel – The experience points required to level up
- xpToLevelIncreaseRate – The rate in which xpToNextLevel increases after leveling up
- interactDist – How far can our player interact with other colliders
- vel – Player’s velocity (How many pixels per second are we moving along the X and Y axis)
- facingDir – The direction in which our player is facing
- rayCast = Reference to get access to the RayCast2D node.
Note that the onready keyword is used for the rayCast variable, in order to readily access the node as soon as the game starts.
Input Maps
Now, we need to figure out what we are going to do for our key presses. To do this, we’re going to use Input Maps to assign custom actions to certain keys.
Let’s go to Project > Project Settings > Input Map.


We’re going to create these 5 new actions by typing in the action names in the Action field.
- move_up
- move_down
- move_left
- move_right
- interact

We can then click on the ‘+‘ icon on the right side, go to Key and press a corresponding key (e.g. ↑ for ‘move_up‘) and hit ‘OK’.
(For ‘interact’, we’re going to have it on the ‘Space’ key.)


Moving The Player
Now, we are going to set up the ability to actually move around. We’re going to do this in a built-in function in Godot, called _physics_process.
func _physics_process(delta):
Since this is a function that gets called 60 times per second, it is good for applying physics in here. The delta parameter is the time duration between frames.
Now, within this script, we can set our velocity (i.e. speed and direction) based on the current input key detected.
For example, if the “move_up” key is detected, then we can move upwards by multiplying -1 to our y velocity and setting our facing direction to be (0, -1).
func _physics_process(delta):

	vel = Vector2()

	# inputs
	if Input.is_action_pressed("move_up"):
		vel.y -= 1
		facingDir = Vector2(0, -1)
Let’s copy and paste this code to set the velocity for the other inputs.
func _physics_process(delta):

	vel = Vector2()

	# inputs
	if Input.is_action_pressed("move_up"):
		vel.y -= 1
		facingDir = Vector2(0, -1)

	if Input.is_action_pressed("move_down"):
		vel.y += 1
		facingDir = Vector2(0, 1)

	if Input.is_action_pressed("move_left"):
		vel.x -= 1
		facingDir = Vector2(-1, 0)

	if Input.is_action_pressed("move_right"):
		vel.x += 1
		facingDir = Vector2(1, 0)
In this lesson, we’re going to be continuing on with our player script.
Movement Velocity
Moving Our Player
In the previous lesson, we’ve set up the functionality to actually move our player around in the _physics_process function.
func _physics_process(delta):

	vel = Vector2()

	# inputs
	if Input.is_action_pressed("move_up"):
		vel.y -= 1
		facingDir = Vector2(0, -1)

	if Input.is_action_pressed("move_down"):
		vel.y += 1
		facingDir = Vector2(0, 1)

	if Input.is_action_pressed("move_left"):
		vel.x -= 1
		facingDir = Vector2(-1, 0)

	if Input.is_action_pressed("move_right"):
		vel.x += 1
		facingDir = Vector2(1, 0)
In order to actually apply the velocity to our character, we can use the move_and_slide() function. This is built into the KinematicBody2D to take collision into consideration.
func _physics_process(delta):

	vel = Vector2()

	# inputs
	if Input.is_action_pressed("move_up"):
		vel.y -= 1
		facingDir = Vector2(0, -1)

	if Input.is_action_pressed("move_down"):
		vel.y += 1
		facingDir = Vector2(0, 1)

	if Input.is_action_pressed("move_left"):
		vel.x -= 1
		facingDir = Vector2(-1, 0)

	if Input.is_action_pressed("move_right"):
		vel.x += 1
		facingDir = Vector2(1, 0)

	# move the player
	move_and_slide(vel * moveSpeed)
Normalizing the velocity
Now if you save the script and hit play, you’ll see that you can now move around with arrow keys. You will also notice that you move at a faster rate if you move diagonally.

To fix that, we can normalize the velocity using .normalized().
func _physics_process(delta):

	vel = Vector2()

	# inputs
	if Input.is_action_pressed("move_up"):
		vel.y -= 1
		facingDir = Vector2(0, -1)

	if Input.is_action_pressed("move_down"):
		vel.y += 1
		facingDir = Vector2(0, 1)

	if Input.is_action_pressed("move_left"):
		vel.x -= 1
		facingDir = Vector2(-1, 0)

	if Input.is_action_pressed("move_right"):
		vel.x += 1
		facingDir = Vector2(1, 0)

	vel = vel.normalized()

	# move the player
	move_and_slide(vel * moveSpeed)
Now that the velocity is normalized, the maximum magnitude of the velocity is fixed to 1. When we move diagonally our (x, y) velocity is going to be (0.5, 0.5) instead of (1, 1).

Transcript
Creating the Player Scene
Welcome back everyone. In this lesson, we are gonna begin to create our player controller. This is going to be a player who we can move left, right, up, down and also have the ability to interact with things such as chests and enemies.
So, to begin, I’m going to go scene, new scene, and we want to have a root node of other node here, and I’m going to search up KinematicBody2D. And this KinemeticBody2D node basically means that we have the ability to move this object around. This is really good if you’re making a character, if you’re making a platformer character, a top-down character, anything that you want to move based on inputs. Uh, KinematicBody2D’s are really good as they also take collision into consideration.
So I’m gonna rename this by double-clicking and I’m gonna call it our player. I’m also gonna save this and I’m gonna save it to our main folder right here as player.tscn, so save that, there we go. Now, on our player here, we need a few components.
First of all, we need a sprite so we can actually see what our player looks like. Now, later on we’re gonna remove this sprite and actually replace it with an animated sprite node so that we can have sprite animations, but right now while we’re setting it up we’re just gonna have in our sprite right here. So, sprites player. And I’m just gonna drag in the player_s_0 node right here. There we go, we can select the player. Set them to be in the center of the scene, there we go. And, as this player, I’m gonna rename this sprite to Sprite.
We also want to attach another node which is gonna be of type collision shape 2D, so collision shape 2D. This is gonna give us a collider so we can’t just move through objects, we have to, we’re gonna bump into them. So, we go shape here, and I’m gonna set this shape to be a capsule. You can set it to be a rectangle if you want, but I just feel that capsules are really good if you move around corners, you don’t get stuck. You can sort of slide around corners with capsules. So I’m gonna resize the height here, resize the width and just sort of get the rough dimensions of the player. Something like that. So there we go. We got our player right here.
Now, finally, what we need is one more component on our player, and that is gonna be a Raycast 2D. So, I’ll show you what that is. We’ll add child node Raycast 2D here. And what you’ll see is a new node appear and this arrow. Now, what a raycast is, is basically, you give a raycast a position and a direction and maybe even a max distance so it shoots a point from a position in a certain direction. In our case right now, we’re shooting it from the middle of our player downwards.
And what a raycast does is it detects anything that it hits. So, we’re shooting a raycast downwards, so this point is gonna keep moving down from our player and if it hits another collider of another object, it’s going to go, “Okay, I hit another collider.” And it is going to return to us a bunch of information about what it hit. So it’s gonna return the object it hit, uh, the distance away from it that it hit and other specific information that we’ll need. So we’re gonna be using this raycast in order to detect if we are looking at an enemy or if we’re looking at a chest so we can interact with it.
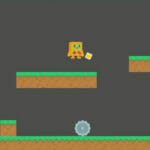
So right now, we’re facing downwards so this raycast is gonna be facing down, but if we move to the right, we’re gonna have our sprite flipped to the right and then we’re gonna have this raycast here, also be pointing to the right. So in the inspector here, you’ll see a few things. We have enabled, which we should actually enable right now, and you’ll see it turns blue. We have exclude parent. Now, exclude parent should be on because if it’s off then it’s always gonna be detecting this player right here ’cause since the point is in the middle of the player, it’s gonna begin, “All right, let’s move downwards” and then it’s gonna go straightaway, “Oop, we hit a collider” because it’s inside the player collider here. So make sure exclude parent is enabled, so ignoring the player.
And cast to is basically where we want this point to cast to. And anything in between this origin point and this end of the arrow – it has the ability to be detected by the raycast and this is gonna be changed so if we’re facing down it’s gonna be facing, the arrow is gonna be pointing this way. If we’re moving to the right, then it’s gonna be something like 50 zero, like that. (keys clicking) Okay, and this is all gonna be changed in script. Exclude parent there. This is all gonna be changed in script, as we’re moving around, but pretty much for our character right here, for our player, these are all the nodes we’ll be needing.
Again, later on, we are gonna replace this sprite node with an animated sprite node, and create some sprite animations so that we actually have a walking animation and idle animations. But for now, we’ve got our scene here, let’s go back to the main scene and I’m gonna drag in our player.TSCN, it should be down the file system if you saved the scene. So, I’m gonna drag that in, just put it in the middle of the scene here, pretty much. We can then press play and see our player right here. So, of course we can’t move the player around just yet because we don’t have the scripting functionality added in yet, but in the next lesson, we’re gonna begin working on that. So I’ll see you all then.
Moving the Player
Welcome back everyone, in this lesson, we’re gonna begin to script our player. In the previous lesson, we set up our player scene right here, with our player and their corresponding nodes. Now, we’re gonna actually script the ability for the player to move around, and then from there, we’ll be moving on with the rest of the project.
So, we got our player, now let’s select the main player node, which is the KinematicBody2D, and down in the script tab, I’m just gonna create a new script called Player.gd, hit enter, and here we go. We’ve got our script right here, I’m gonna delete this stuff here, since we don’t really need that, that’s just more explaining how to do variables, how to do functions, stuff like that, but we do want to keep the extends KinematicBody2D line here because we do want it to have many of the KinematicBody2D functionality, that comes with the node.
So, we got all this, now what we need to do is, first of all, create our variables that we’re gonna be using. So first up, we’re gonna go var, to define a variable, we’re gonna have curHP, which is gonna be our current HP, that’s gonna be of type integer, so it’s gonna be a whole number, and we’ll just have that equal to 10. Along with this, we’re gonna have a maxHP, which is equal to 10 as well.
We’re gonna have a moveSpeed, which is gonna be an int, and the reason why moveSpeed is an integer is because this is determining how many pixels per second are we gonna be moving at, and this is gonna be 250 pixels per second. Then we wanna have one for damage, so how much damage are we gonna be dealing every time we attack an enemy, to make it easy for now, we’re just gonna have this equal to one. We also then want to have a variable to keep track of our gold. So how much gold do we have. We’re gonna have zero to start off with.
Then we have our leveling. So with our leveling, we’re gonna have a current level, and current XP, so we’ll go var curLevel, of type int equals zero, by default, and curXp, which is int equals zero. Now, to determine how much XP we need to level up, we’re gonna have a variable called xpToNextLevel. This is gonna be of type integer, and this is gonna be equal to 50, by default.
So by default, we’re gonna need 50 XP to level up, but normally when you have a game with a leveling system, every time you level up, the xpToNextLevel increases as well ’cause we don’t want it to just stick on 50 XP to level up to every single level, as that will probably take no time at all. You want it to go up by a certain rate, every single time you level up.
So to do that, we are going to create a variable here called xpToLevelIncreaseRate, this is gonna be a float, which is a decimal variable, and we’re gonna have this equal to 1.2. So every time we level up, this xpToNextLevel, is gonna be multiplied by our xpToLevelIncreaseRate, so let’s just say we’re on level zero right now, we get 50 XP, we go to level one, then this 50 here, is going to be multiplied by 1.2, which is 60.
Now, we need sort of some variable for our interaction, how far away are we gonna be able to interact with something, and this is gonna be our variable called interactDist, of type int, and this will be 70, so we’re gonna be able to interact with stuff 70 pixels away, and after this we’re just gonna need a few more variables, for our components and for our vectors.
So first we’re get a variable called vel, for velocity, and this is gonna be of type Vector2, and we’ll just have this equal Vector2, by default here. So this velocity here, is gonna contain our X, and Y velocity, how many pixels per second we’re moving along the X axis, and along with the Y axis, and we’re gonna be storing that here so that we can know, okay let’s apply this to our player every frame, and then we’re also gonna have a variable for our facing direction, so facingDir, of type Vector2 again, equals Vector2.
Now the facing direction is different from velocity because when we stop moving, velocity is gonna equal two zero, yet the facing direction is gonna stay whatever was the last direction we moved in, so if we moved up, facing direction with be 0, 1, if we move down, it’ll be 0, -1, if we move left, it’ll be 1, 0, and if we move right, it will be -1, 0, so this is gonna determine then, what animation we’re gonna be playing, based on where we’re moving, which direction we’re facing.
And finally for our variables for now, we’re gonna have a variable to keep track of our ray cast, so we’ll go rayCast, and this is gonna be needed to get when the game is started up, we need to get our node so we’re gonna have this as an on ready variable, which basically means that whatever is after this equals sign, is gonna be called, once this node here, is initialized. So what we can do is we can go onready var rayCast= get_node, and we can just then go RayCast2D, so it’s gonna search for this node, once the game starts, okay.
So we got our variables here, now what we need to do is actually figure out what are we going to do for our key presses. How are we going to be able to detect our inputs, and what are those inputs in the first place? Well, Godot has a really good system in place. I’ve got the input map, where we can create actions, and assign those actions certain keys.
So if we go up here to project, project settings, and then we go to the input map, you can see here, that there are a bunch of actions already made for us, mainly to do with the UI. So what we’re gonna do is we’re gonna create five new actions. This is gonna be move_up, hit enter, and at the bottom here, you’ll see that there is new action called move_up, and we’re gonna create the rest right now.
So we’ve got move_down, move_left, move_right, and interact, so there we go, we got our five actions right here, so on move_up, let’s click on the plus icon on the right-hand side, we then want to go key, and to move up, we’re gonna have this as the up arrow, so I’m just gonna hit the up arrow right here, hit okay, and there you go, the move_up action is assigned to the up arrow. For move_down, we’re gonna have this to the down arrow. For move_left, we’re gonna have this to the left arrow. For move_right, we’re gonna have this to the right arrow, and for interact, we’re gonna have this on the space key.
But if you do want to re-bind these to whatever sort of key inputs you want, you can of course, do that. You can even assign these to the mouse inputs, even joy buttons, if you have a game pad plugged in.
Okay, so I’m gonna hit close, and now what we can do is set up the ability to actually move around. So this here, is gonna be done inside of a function called func, and this is gonna be called _physics_process, and you can see it right here, I’m just gonna hit enter, and this physics process function is built into Godot, and it gets called 60 times a second.
Now this function is similar to the process function without physics at the start, and the process function gets called every single frame, but the difference between that, and the physics process function is that, since this one gets called 60 times a second, no matter what the frame rate, it’s very good for having physics in here, it’s very good for calculating physics, and applying those forces because if you have an inconsistent core rate, it can have some inconsistencies with physics, as it’s highly recommended to do all physics stuff inside of the physics function right here, and this delta parameter is basically the time duration between frames, so since we’re running at 60 times per second, this is I believe, 1/60, whatever that small value is, okay.
So, we got our function here. Now what we need to do is first of all, set vel to equal Vector2.0, so we’re resetting our vector velocity here because we don’t want this to carry over between frames, we don’t want to be able to press the up arrow, and release it and we’re still moving upward, we don’t want that, we want the moment we release from the up arrow, our player stops moving.
So we got that, now we want to be able to work on our inputs, detecting when we press a certain key, so we’ll just go # inputs for a comment here, so we know what’s happening, and in here, we’re just gonna go if Input.is_action_pressed, and this action here will be move_up, so if we hit the move_up button, then what we’re gonna do is we’re gonna set vel.y -=1, and facing direction, is gonna be equal to Vector 2, 0, -1.
There we go, we’re setting our Y velocity, and we’re setting our facing direction here, now we can just go copy, and paste this four times, or three times so there’s a total of four. Replace this with move_down, move_left, and move_right. So for move_down, vel.y is gonna be += 1, and the facing direction is gonna be 0, 1. For move_left, the vel.x is gonna be -= 1, and the facing direction is going to be -1, 0, and for move right, we’re gonna have vel.y +=1, with a facing direction of 1, and 0.
So, we’ve got this set up, we got our inputs detected, so when we press the up arrow, we’re gonna be setting our velocity, and our facing direction. So from here, what we’re gonna be doing is making it so that these are then applied to our player, so we’re gonna then go into move in the direction of the velocity multiplied by our moveSpeed, and we’ll be doing that all in the next lesson, so I’ll see you all then.
Movement Velocity
Welcome back everyone! In this lesson we are going to be continuing on with our player script right here. Adding in the functionality for us to move our player around using the arrow keys.
So in the previous lessons, we set up our variables right here. Some of them we are using right now. Some of them we are going to be using a bit later, but we are setting them all up right here. Then, inside of the physics process function, which gets cords 60 times a second, we are first of all resetting our velocity vector, so this makes it so that if we press an arrow key we don’t keep moving in that direction even if we are not holding it. The moment we release that key, we will stop moving.
Then down here, we are detecting our inputs because we created various different actions, such as move up, move down, move left, move right and these were assigned to certain arrow keys. So, if we are moving up, we’re setting our y velocity to negative one or we’re subtracting one from the velocity.y. And we’re setting our facing direction so the direction we’re facing in. We are doing the same to move down, move left, and move right.
Okay, so, in order to move, all we need to do is call the move and slide function right here and this is built into the kematic body 2D node. And this basically takes into consideration collision, the direction the ground is facing. Now since we’re having a top-down game, we don’t really need to worry about the ground as that is sort of below us and kind of irrelevant to the game. So, we just need to give it a velocity and that is going to be vel multiplied by our move speed. So, we can vary how fast we are moving right there. So, this here is going to move the player.
Now if you press play, you’ll see that we can move left, we can move right, we can move down, we can move up. But something you might also notice is that if we move diagonally you can see we move faster. It seems like we move at a faster rate than if we’re just moving along a single axis. So, why is that happening? Well, if we quit playing the game here that is something we can easily fix.
With our velocity vector right here, it has an x and a y value. Now if we are moving just up, the x value is zero and the y value is negative one. And the absolute value of that if we get rid of the minus so it is just a whole number, or a positive number that is zero plus one. So, the magnitude of this vector here is going to be one. Zero plus one. Yet, if we are moving up and we’re moving right, that’s going to be one plus one so the magnitude of the velocity is two. So, you can see that we’re moving faster if we are moving diagonally.
Now to fix that, we can do something known as normalization. So down here, just under where we’re getting our inputs I’m going to go vel equals vel.normalized. And what this will do is this basically converts the magnitude of the velocity back down to one. So, instead of the x and the y being one and one, it’s going to be something like 0.5 and 0.5. So, we’re going to move slower on the x and y values but the actual speed the player is moving at is going to be the same as if we are moving along just one axis. So, I am going to add in a little comment here so it explains what we’re doing. We are normalized the velocity to prevent faster diagonal movement.
Let’s press play and I’ll show you how that works. So again, we can move left, we can move right, we can move up, we can move down. But if we up and right you will see that we move slower than before we don’t move at the increased rate of speed because we are not adding in the x and they y velocity, we are moving along the exact same pixels per second thanks to normalizing the vector. And this is really good for pretty much every game that has movement if you have players that can move diagonally. You always want to normalize the vector so that diagonal movement isn’t faster. Okay so, we got our movement here implemented.
Now in the next lesson, we’re going to be going over setting up some sprite animations. Because right now, we have our movement but it looks pretty bland. The player doesn’t move, the player doesn’t rotate to face the direction they are looking at. They just stay statically looking at the camera. So, that’s what we’ll be working on in the next lesson.
Interested in continuing? Check out the full Create a 2D RPG with Godot course, which is part of our Godot Game Development Mini-Degree.